1. Adding New Items
The first thing most people want to do after installing RocketDock is add new items. There are a few different ways of doing this:
You can simply drag -n- drop a new item into RocketDock from almost any location; your desktop, an Explorer window, the Quick Launch Bar, and the Start Menu.
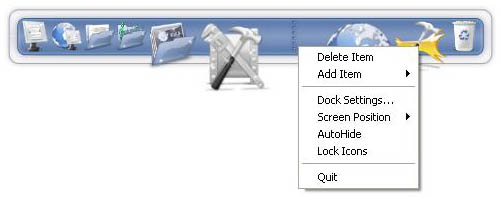
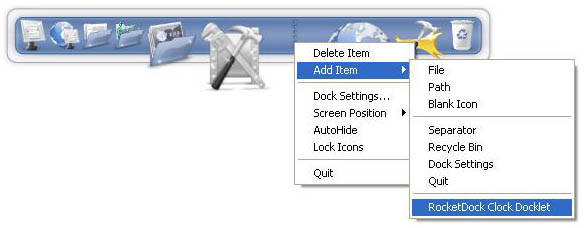
Another way to add items is by right clicking on RocketDock and viewing the "Add Item" menu.
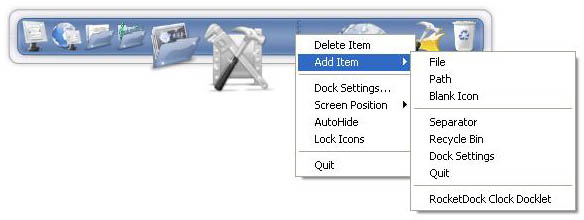
From here you have a few options to choose from and each will add a different type of item to RocketDock. Let's break each one down.
- File: You can choose any type of file to add to RocketDock. When clicked it will open that file in its default application.
- Path: You can add any folder to RocketDock. When clicked the folder will open in Explorer.
- Blank Icon: This option creates an item with no icon settings. When clicked it will bring up the RocketDock "Icon Settings" window so you can manually configure its properties. This is useful when you want to add special items that are not files or folders. An example would be a link to a webpage.
- Separator: Adding a separator between icons helps you organize them into different categories, or just add a visual break.
- Recycle Bin: This adds a shortcut to the Recycle Bin that has both an empty and full state.
- Dock Settings: This is a special item. In case you removed the Dock Settings item on RocketDock, this will add it back in.
- Quit: This adds an icon when pressed will quit RocketDock.
2. Docklets
Docklets are like mini applications that do one task and run inside RocketDock. They vary from system meters for RAM usage to a Recycle Bin item that changes the icon depending on whether the system Recycle Bin is full or empty. You can add docklets to RocketDock by dropping them in the RocketDock Docklets folder located at:
C:\Program Files\RocketDock\Docklets (default location)
Afterwards right click on RocketDock and in the "Add Item" menu there will now be additional options to add each docklet you have in the folder.
Note: RocketDock has support for ObjectDock docklets only.
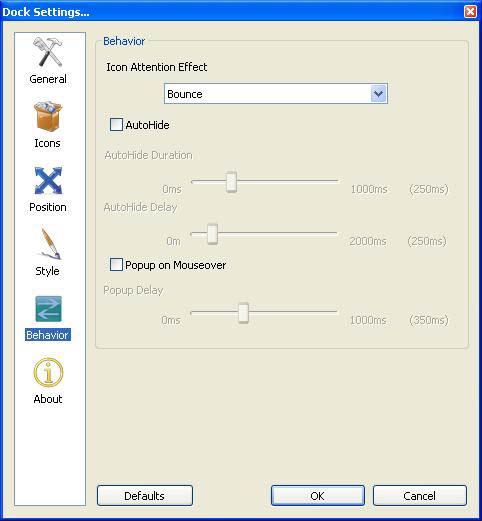
3. Customizing Items
You can change the way each item looks on RocketDock. Simply right click on an item you want to change and select "Icon Settings."
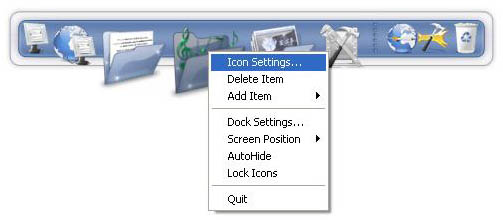
From here you will now see the Icon Settings window where you can change the properties of your item.
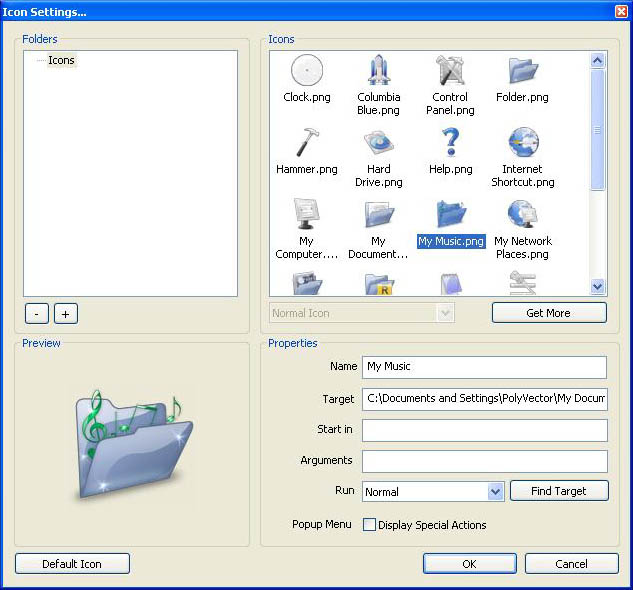
Folders
Here you will see a list of all the folders you currently have in your RocketDock Icons directory located at:
C:\Program Files\RocketDock\Icons (default location)
You can add any icons to this folder and have them available. The - and + buttons allow you to add and remove folder directories that do not appear in your RocketDock Icons folder.
Icons
This pane will show you a preview of all the icons available in the folder you have selected in the Folders section.
Preview
You can see which icon you have selected to use for your item. The drop down menu below the preview window (usually showing "Normal Icon" grayed out) is used for different icon states. This is most commonly used for the Recycle Bin full and empty icons.
Properties
Here is where you change how your item title displays, where the item links to, and other special actions are available.
- Name: Set the label that appears when your mouse goes over it in RocketDock.
- Target: Here is the location of the item on your computer.
- Start In: This sets the working directory for the target application.
- Arguments: Sets optional parameters for the target application.
- Run: This sets the minimize state of the window when the item is launched from RocketDock.
- Find Target: Allows you to change the Target field by selecting a file or folder of your choice.
- Popup Menu: This will choose between displaying special actions in the RocketDock context menu for an item. A good example is when having an Internet Connection shortcut present in RocketDock with the "Display Special Actions" option checked.
4. Removing Items
You can remove items from RocketDock two different ways. The first is simply dragging the item off RocketDock and dropping it on your desktop. It will then simply vanish. The second is right clicking on the item and using the "Delete Item" option.
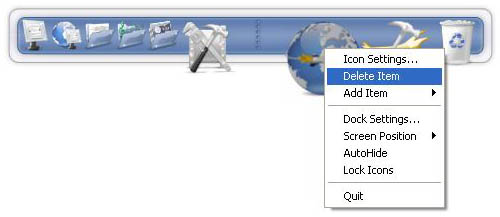
You can remove separators in the same fashion. Docklets can only be removed by dragging them out of RocketDock.
5. Drag 'n Drop
You can drag files and folders into the items on your dock.
If you drag a file/folder into an application item it will launch and load the file/folder if that application supports it. For example if you drag a PNG onto a Photoshop shortcut it will launch and load that image.
If you drag a file/folder into a folder item then it will be copied into that folder. Each item will react the same way as an item would on your desktop.
If you drag files/folders into an item that points to the Recycle Bin they will be deleted.
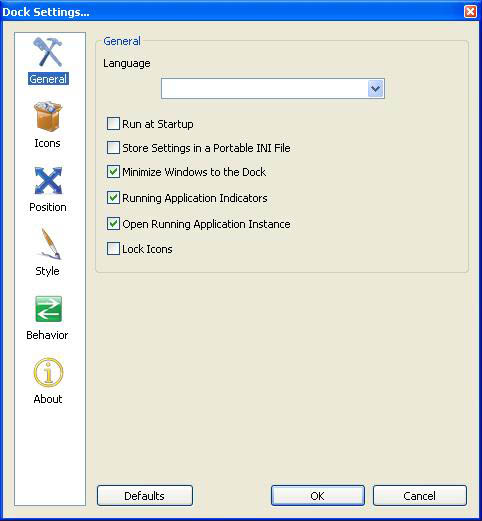
6. Minimized Windows
If you have enabled "Minimize Windows to the Dock" in General Settings, your minimized windows will show up as icons on your dock. These window icons can be dragged around as you might expect, but cannot be deleted by dragging off the dock. In Windows Vista, they will be rendered as a real-time preview if you have Desktop Composition enabled in your Windows performance settings.
You can open or close a window by right-clicking on the window icon and selecting "Open Window" or "Close Window." By default the window will be opened if you simply click on it.
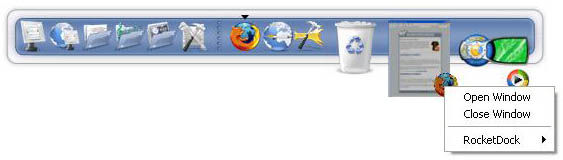
You can prevent a specific window from minimizing to the dock by holding Control while you minimize it. This will ensure that your favorite media player or chat client will minimize to the taskbar or system tray as you would expect.